The Ultimate Guide to Emergency Water Storage: Ensuring Your Lifeline
Water is the most essential element for survival. In an emergency, access to clean, safe drinking water can be compromised. This guide provides detailed information on how to source, treat, store, and manage water to ensure your household's needs are met during any crisis.
💧 WHY WATER STORAGE MATTERS
- Humans can survive 3 weeks without food, but only 3 days without water
- In disasters, water systems fail first—boil advisories, contamination, or shutoffs are common
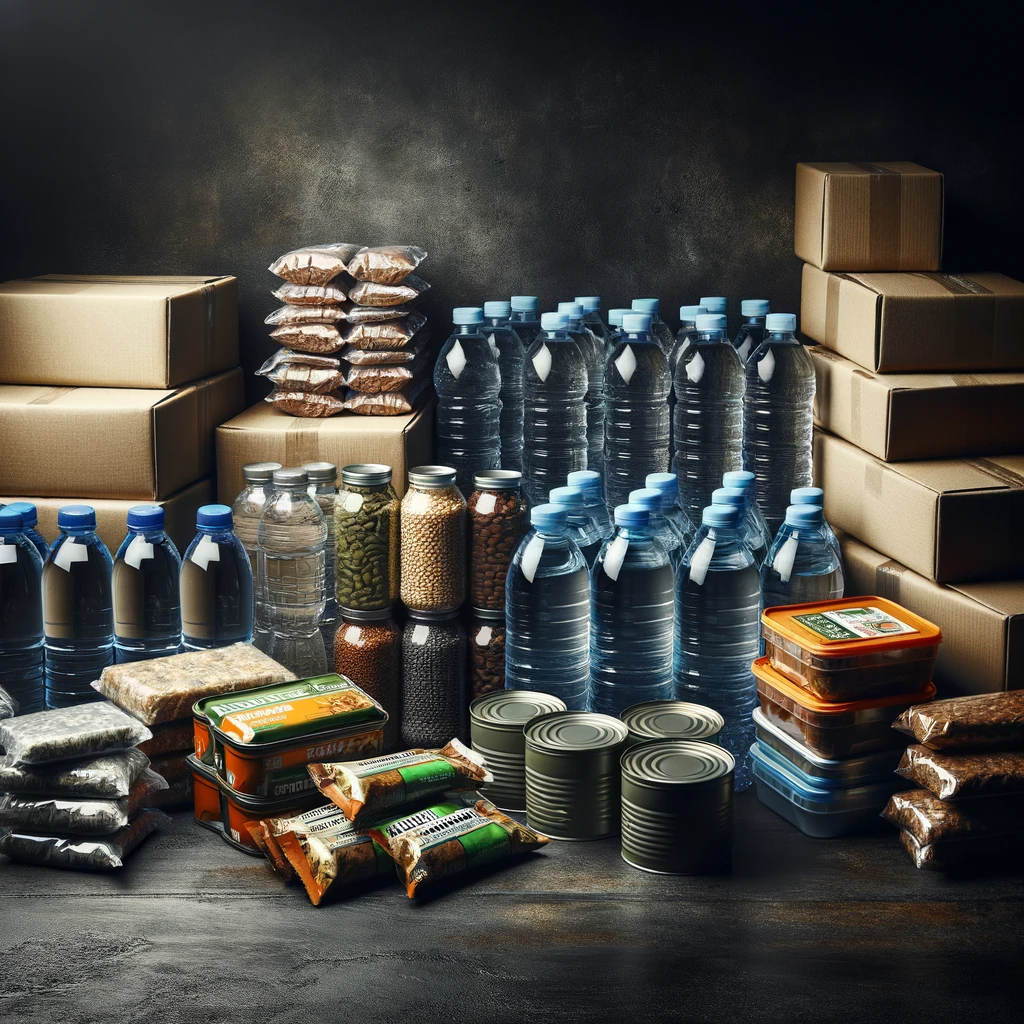
- You’ll need water for: drinking, cooking, hygiene, sanitation, pets, and cleaning wounds
Table of Contents
The Vital Role of Water in Emergencies
- Why Water is Critical
- How Much Water Do You Need?
Understanding Water Safety & Potential Contaminants
- Types of Water Contaminants
- Risks of Consuming Unsafe Water
Sources of Water for Storage & Emergency Use
- Commercially Bottled Water: The Easiest Option
- Municipal Tap Water: A Readily Available Source
- Well Water & Other Private Sources
- Emergency Sources (Rainwater, Surface Water) - Use with Extreme Caution
- A. Rainwater Collection
- B. Surface Water (Rivers, Lakes, Streams, Ponds, Springs)
Choosing the Right Water Storage Containers
- Key Criteria for Safe Water Containers
- Recommended Container Types
- Containers to AVOID
- Preparing Containers for First Use or Reuse
Water Treatment & Purification Methods
- When and Why to Treat Water
- Boiling: The Gold Standard for Pathogens
- Disinfection with Unscented Liquid Chlorine Bleach
- Water Purification Tablets & Drops
- Water Filters
- UV (Ultraviolet) Purifiers
Step-by-Step Guide to Storing Water
- Storing Commercially Bottled Water
- Storing Treated Tap Water (or Treated Well/Rainwater)
Optimal Storage Conditions & Location for Water
- The Ideal Environment
- Protecting Your Water Reserves
Shelf Life, Rotation & Inspection of Stored Water
- Shelf Life of Stored Water
- Rotation Schedule
- Inspecting Your Stored Water
Using Your Stored Water Safely & Wisely
- Checking Before Use
- Conserving Water During an Emergency
- Important Disclaimers & Best Practices for Water Storage
1. The Vital Role of Water in Emergencies
Life as we know it cannot exist without water. It's crucial for hydration, food preparation, hygiene, and sanitation. During emergencies like natural disasters, power outages, or infrastructure failures, your regular water supply may become unavailable or contaminated.
Why Water is Critical:
- Survival: The human body can only survive a few days without water. Dehydration impairs physical and mental functions rapidly.
- Hygiene & Sanitation: Clean water is essential for handwashing, cleaning wounds, and general sanitation to prevent the spread of disease, which can be a major threat in disaster situations.
- Food Preparation: Many emergency food supplies require water for rehydration and cooking.
How Much Water Do You Need?
The standard recommendation is to store at least four litres (one U.S. gallon) of water per person per day.
- Drinking: Plan for two litres (half a U.S. gallon) per person for drinking.
- Hygiene & Cooking: Plan for an additional two litres (half a U.S. gallon) per person for light food preparation and basic hygiene.
- Minimum Duration: Aim for a minimum of a 3-day supply, but a 2-week supply is highly recommended if space and resources permit.
- Special Needs: Consider additional water for pregnant or nursing mothers, individuals who are ill, children, and for those living in hot climates or at high altitudes. Don't forget pets!
2. Understanding Water Safety & Potential Contaminants
Not all water is safe to drink. Understanding potential contaminants is key to ensuring your stored water remains safe.
Types of Water Contaminants:
- Microbiological Pathogens: Bacteria (e.g., E. coli, Salmonella), viruses (e.g., Norovirus, Hepatitis A), and protozoa (e.g., Giardia, Cryptosporidium). These are the most common immediate threats from contaminated water, causing waterborne diseases.
- Chemical Contaminants: Pesticides, herbicides, heavy metals (e.g., lead, arsenic), industrial pollutants, and chemicals leaching from unsuitable storage containers. These can cause long-term health effects or acute poisoning.
- Radiological Contaminants: Radioactive isotopes from industrial accidents or natural sources. This is less common but requires specialized filtration if present.
Risks of Consuming Unsafe Water:
Drinking contaminated water can lead to a range of health issues, from mild gastrointestinal distress (diarrhea, vomiting) to severe, life-threatening illnesses like cholera or dysentery. In an emergency, medical help may be limited, making prevention paramount.
3. Sources of Water for Storage & Emergency Use
While commercially bottled and treated tap water are preferred for planned storage, in a prolonged emergency, you might need to find water from other sources.
Commercially Bottled Water: The Easiest Option
- Pros: Sealed at the source, generally safe and sterile if unopened, convenient, no initial treatment needed.
- Cons: More expensive for large volumes, packaging creates plastic waste, finite shelf life (due to plastic degradation, not water spoilage).
- Best For: Starting your emergency supply, grab-and-go kits.
Municipal Tap Water: A Readily Available Source
- Pros: Inexpensive, readily available in most homes, generally treated to be safe for drinking at the point of delivery.
- Cons: Can become contaminated during a disaster (e.g., pipe breaks, treatment plant failure). May require treatment before long-term storage, especially if chlorine levels are low.
- Best For: Bulk storage if properly treated and stored.
Well Water & Other Private Sources
- Pros: Independent of municipal systems.
- Cons: Quality can vary; susceptible to contamination from groundwater issues or power loss affecting pumps. Should be tested regularly during normal times. Always treat well water before storing for emergency use.
- Best For: Those with existing safe wells, with the understanding that it needs treatment for storage.
Emergency Sources – Use with Extreme Caution & Rigorous Treatment
These sources are presumed contaminated and require careful collection and thorough purification.
A. Rainwater Collection
Rain itself is pure, but it can become contaminated as it falls and by the surfaces it contacts.
Collection Methods:
- Tarps/Plastic Sheeting: String up a clean tarp or plastic sheet with a low point draining into a clean collection container.
- Direct Collection: Place large, clean, food-grade containers in an open area during rainfall.
- Rooftop Catchment (Use with caution): If your roof is made of suitable material (e.g., metal, some tile – avoid asphalt shingles, treated wood, or roofs with lead/asbestos components if possible), you can collect runoff. Disconnect any system that diverts the "first flush."
Associated Risks:
- Atmospheric Pollutants: Dust, soot, chemicals in the air, especially in urban or industrial areas.
- Collection Surface Contamination: Bird droppings, leaves, insects, roofing materials (asphalt, tar, lead, asbestos from older roofs), chemical treatments on wood.
- Container Contamination: Using unclean containers.
Dealing with Risks & Treatment:
- First Flush: Allow the first 10-20 minutes of rain to wash away contaminants from the collection surface before you start collecting the water you intend to store/use. This is especially important for rooftop systems.
- Clean Surfaces: Use the cleanest possible surfaces for collection.
- Cover Collection Containers: Prevent debris from falling in.
- Pre-filter: Pour collected rainwater through a clean cloth or coffee filter to remove larger particles and debris.
- Purify: Always purify rainwater before drinking.
- Boiling: For 1 minute (3 minutes at high altitude) is highly effective.
- Disinfection: With unscented bleach or purification tablets as per instructions.
- Filtration: Use a quality water filter rated to remove bacteria and protozoa (and viruses if possible).
- UV Light: Can be used if water is clear after pre-filtering.
B. Surface Water (Rivers, Lakes, Streams, Ponds, Springs)
All surface water sources should be considered heavily contaminated.
Collection Methods:
- Collect water from the clearest part of the body of water, preferably upstream from any obvious sources of pollution (e.g., human settlements, agricultural areas, industrial discharge points).
- If possible, choose fast-flowing water over stagnant water.
- Avoid collecting water with strong odors, discoloration, or visible algae blooms/scum.
Associated Risks (High):
- Microbiological Pathogens: Bacteria (E. coli, Salmonella, Cholera), viruses (Norovirus, Hepatitis A, Rotavirus), protozoa (Giardia, Cryptosporidium) from human and animal waste, agricultural runoff. This is the most immediate danger.
- Chemical Contaminants: Pesticides, herbicides, fertilizers from agriculture; industrial waste (heavy metals, solvents); fuel/oil spills. These are harder to detect and remove with basic methods.
- Physical Contaminants: Sediment, silt, debris, organic matter.
Dealing with Risks & Treatment (Multi-Barrier Approach Recommended):
- Selection: Choose the least contaminated source available. Digging a "seep well" a few feet from the bank of a river or lake can sometimes provide naturally filtered (though still contaminated) water.
- Sedimentation (Settling): Let the collected water stand undisturbed in a container for several hours to allow larger particles and some sediment to settle to the bottom. Carefully pour or siphon off the clearer water from the top, leaving the sediment behind.
- Pre-filtration: Pour the clearer water through layers of clean cloth (like a t-shirt or bandana), coffee filters, or a makeshift sand/charcoal filter to remove finer particles and improve clarity. This is crucial if you plan to use UV or chemical disinfection, as turbidity reduces their effectiveness.
- Purification (Mandatory - choose one or combine):
Boiling: The most reliable method for killing all pathogens. Boil for 1 minute (3 minutes at high altitudes). This will not remove chemical contaminants.
Filtration: Use a high-quality portable water filter specifically designed to remove bacteria and protozoa. Filters with a pore size of 0.2 to 0.4 microns are generally effective for bacteria and protozoa. For viruses, a pore size of 0.02 microns or a filter with specific virus-removal technology (like ultrafiltration or a built-in chemical agent) is needed.
Chemical Disinfection: After thorough pre-filtration, use unscented bleach or water purification tablets/drops as per instructions. Be aware that some protozoa like Cryptosporidium are highly resistant to chlorine at standard doses; chlorine dioxide tablets are more effective.
UV Light: Can be used after water has been filtered to be very clear. Effective against all pathogens.
- Chemical Contamination Awareness: If chemical contamination is suspected (e.g., near industrial sites, heavy agricultural areas, or if water has an oily sheen or chemical smell), basic purification methods like boiling or simple filtration might not remove these. Activated carbon filters can reduce some chemical contaminants and improve taste, but may not remove all harmful chemicals. In such cases, finding an alternative water source is highly advisable.
4. Choosing the Right Water Storage Containers
The container you choose is critical for keeping your water safe and palatable.
Key Criteria for Safe Water Containers:
- Food-Grade Material: Must be designated as safe for contact with food and beverages. Look for symbols like "Food Safe," a cup and fork icon, or specific plastic resin ID codes (see below).
- Clean & Sanitized: Containers must be thoroughly cleaned and sanitized before use.
- Durable & Strong: Able to withstand the weight of water without leaking or breaking.
- Opaque or Stored in Dark: Light can promote algae growth (even in treated water). If containers are clear, store them in a dark location.
- Airtight Seal: A good lid prevents evaporation and entry of contaminants.
Recommended Container Types:
Food-Grade Plastic Containers (HDPE or #2 Plastic):
- Examples: Dedicated water storage barrels (often blue), robust jerry cans, some buckets.
- Pros: Lightweight, durable, relatively inexpensive, often opaque.
- Resin ID Code: Look for a triangle with "2" or "HDPE" underneath.
Food-Grade Plastic Containers (PETE or #1 Plastic):
- Examples: Commercially bottled water/soda bottles (can be reused for water storage after thorough cleaning if in good condition and designated for reuse by type).
- Pros: Readily available.
- Cons: Not as durable as HDPE for very long-term, repeated use. Can be prone to developing leaks if creased or damaged.
Glass Containers:
Examples: Large glass carboys or jugs.
Pros: Impermeable, doesn't leach chemicals, easy to clean.
Cons: Heavy, breakable, usually clear (requiring dark storage). Protect from impact.
- Stainless Steel Containers:
- Pros: Very durable, blocks light, doesn't leach.
- Cons: Can be expensive, heavy. Ensure it's food-grade stainless steel.
Containers to AVOID:
- Milk Jugs (plastic or cardboard): Difficult to clean adequately due to milk protein and fat residues, prone to bacterial growth. Plastic may degrade.
- Non-Food-Grade Plastics: May leach harmful chemicals into the water.
- Containers Previously Used for Chemicals: Never use containers that once held non-food items like gasoline, pesticides, solvents, or other toxic substances, even if "cleaned." Residues can remain.
- Open Vessels or Containers without Secure Lids.
Preparing Containers for First Use or Reuse:
- Wash: Thoroughly wash the container and lid with dish soap and hot water. Rinse completely.
- Sanitize: Prepare a sanitizing solution of 1 teaspoon (5 ml) of unscented liquid household chlorine bleach (typically 5-9% sodium hypochlorite concentration) per 4 litres (1 U.S. gallon) of water.
- Swish & Soak: Pour the sanitizing solution into the container, close the lid, and swish the solution around to coat all interior surfaces. Let it sit for at least 1-2 minutes.
- Rinse (Optional but Recommended): For water storage, it's best to thoroughly rinse out the sanitizing solution with clean tap water. If rinsing is not possible or desired (some protocols allow air drying with residual sanitizer), ensure bleach concentration was precise. For most home storage, rinsing is a good practice.
- Air Dry: Allow the container to air dry completely upside down on a clean surface, or dry with a clean, lint-free cloth if filling immediately.
5. Water Treatment & Purification Methods
If not using commercially bottled water, treatment is essential to kill harmful microorganisms.
When and Why to Treat Water:
- Before Storage: Treat municipal tap water (if chlorine levels are low or unknown) or any raw water (well, rain, surface) before sealing it in storage containers to prevent microbial growth during storage.
- Before Use: If you suspect stored water (even previously treated) might have become contaminated, or if using water from an emergency source (river, lake), treat it again immediately before drinking.
Boiling: The Gold Standard for Pathogens
- Action: Kills bacteria, viruses, and protozoa.
- Method: Bring water to a rolling boil for at least 1 minute. At altitudes above 2,000 meters (6,500 feet), boil for 3 minutes.
- Pros: Highly effective against pathogens. No chemicals needed.
- Cons: Requires fuel/heat source. Doesn't remove chemical pollutants, sediment, or improve taste (can taste flat; aerate by pouring between clean containers).
Disinfection with Unscented Liquid Chlorine Bleach
Use standard, unscented liquid household bleach containing 5-9% sodium hypochlorite as the only active ingredient. Do NOT use scented, color-safe, or splash-less bleaches. Check the expiration date on the bleach; it loses potency over time (typically within 6-12 months after opening).
For Clear Water:
- Add 2 drops of bleach per litre of water (or 8 drops per U.S. gallon, approximately 6-7 drops per Imperial gallon).
For Cloudy or Murky Water (after pre-filtering):
- Add 4 drops of bleach per litre of water (or 16 drops per U.S. gallon, approximately 12-14 drops per Imperial gallon).
Method:
- Add bleach to water, stir or mix well.
- Let stand for at least 30 minutes before use. The water should have a faint chlorine odor.
- If it doesn't have a faint chlorine smell after 30 minutes, repeat the dosage and let stand for another 15-30 minutes. If it still doesn't smell of chlorine, the water may have too high a demand, or the bleach may be too old/weak. Consider an alternative water source or purification method.
- Pros: Effective against most bacteria and viruses, readily available chemical.
- Cons: Exact measurement is crucial. Less effective against some protozoa like Cryptosporidium at standard doses (filtration or boiling is better for Crypto). Can affect taste. Bleach degrades over time.
Water Purification Tablets & Drops
- Types: Iodine-based, Chlorine Dioxide-based.
- Method: Follow manufacturer's instructions precisely regarding dosage, water temperature, and contact time.
- Pros: Lightweight, portable, good for bug-out bags or small quantities. Chlorine dioxide is effective against Cryptosporidium.
- Cons: Can impart taste (especially iodine). Limited shelf life. Can be expensive for large volumes. Iodine not suitable for pregnant women, those with thyroid issues, or for long-term continuous use.
Water Filters
- Types: Range from personal straw filters and pitcher filters to larger gravity-fed or pump systems.
- Pore Size Matters:
- Microfiltration (0.1 - 1 micron): Removes protozoa (Giardia, Crypto) and bacteria.
- Ultrafiltration (0.01 - 0.1 micron): Removes the above plus viruses.
- Nanofiltration/Reverse Osmosis: Removes the above plus some chemicals, heavy metals.
- Activated Carbon: Often included to improve taste and remove some chemicals, but doesn't remove pathogens on its own.
- Pros: Can remove sediment and improve taste. Effective against specific contaminants depending on filter type.
- Cons: Can clog, especially with turbid water. No protection against viruses unless specified (e.g., ultrafiltration or specific viral agent). Cartridges need replacement. Some don't remove dissolved chemicals.
UV (Ultraviolet) Purifiers
- Action: Uses UV light to damage the DNA of bacteria, viruses, and protozoa, rendering them harmless.
- Method: Handheld UV pens or units are submerged or passed through the water according to manufacturer's instructions. Water must be clear for UV to be effective.
- Pros: Kills all pathogens effectively. No chemicals or taste alteration. Fast.
- Cons: Requires batteries or power source. Not effective in cloudy or murky water (sediment shields microbes). Doesn't remove chemical pollutants.
Important Note on Treatment: For raw, untreated water, especially surface water, a multi-barrier approach is often best (e.g., settling, then filtering, then boiling or chemical disinfection/UV).
6. Step-by-Step Guide to Storing Water
Storing Commercially Bottled Water:
- Purchase: Buy water in its original sealed containers. Check the "best by" or expiration date if provided (this usually relates to the plastic, not the water itself, but fresher is better).
- Inspect: Ensure bottles are undamaged and seals are intact.
- Store: Place in a cool, dark location away from direct sunlight, heat sources, and chemicals (like gasoline, pesticides, cleaning supplies).
- Label (Optional): You can add your purchase date with a permanent marker.
Storing Treated Tap Water (or Treated Well/Rainwater):
- Select Containers: Choose appropriate food-grade containers (see Section 4).
- Clean & Sanitize: Thoroughly clean and sanitize containers and lids as described in Section 4.
- Treat Water (if not municipal tap water already containing sufficient residual chlorine):
- For municipal tap water that you trust and has a detectable chlorine odor, you might store it directly. If unsure, or if it's well water or rainwater, treat it.
- Use unscented liquid chlorine bleach as described in Section 5. For large volumes (e.g., 55-U.S. gallon drum), verify bleach amounts with reliable emergency preparedness resources, but it's often around 1/4 teaspoon of 5-9% bleach per 5 gallons, scaling up carefully (approx. 2.5-3 teaspoons for 55 gallons). Always confirm these larger volume calculations with official sources like FEMA or CDC guidelines.
- Fill: Fill containers, leaving minimal headspace (air) to reduce oxidation, but allow for expansion if water might freeze.
- Seal: Securely close containers with airtight lids.
- Label: Clearly label each container with "DRINKING WATER" and the date it was stored (e.g., "Drinking Water - May 2025").
- Store: Place in a cool, dark, dry location away from direct sunlight, heat, and chemicals. Do not store directly on concrete floors if possible (use wooden planks or pallets as a barrier to prevent potential leaching or temperature transfer).
7. Optimal Storage Conditions & Location for Water
Where and how you store water impacts its safety and longevity.
The Ideal Environment:
- COOL: Avoid heat sources (furnaces, direct sunlight, hot attics/garages). Heat can cause plastics to degrade or leach chemicals faster. Ideal temperatures are typically between 10°C - 21°C (50°F - 70°F).
- DARK: Sunlight (UV rays) can degrade plastic containers and promote algae or bacterial growth if any residual organisms are present and the water is untreated or poorly treated.
- DRY: Store in a dry area to prevent corrosion of metal lids (if any) or degradation of cardboard packaging on some commercial water.
Protecting Your Water Reserves:
- Away from Contaminants: Never store water near gasoline, kerosene, pesticides, herbicides, cleaning supplies, or other volatile chemicals. Plastic containers can be permeable to vapors, which can contaminate the water.
- Off the Floor (Especially Concrete): Storing containers directly on concrete can sometimes lead to chemicals leaching from the concrete into the plastic over time, or temperature fluctuations. Use wooden pallets, shelves, or 2x4s to create a barrier.
- Accessibility: Store water where it can be accessed reasonably easily in an emergency, but also protected from damage or tampering.
- Structural Integrity: Ensure shelving or storage areas can support the weight of the water (water is heavy: ~1 kg per litre or ~8.34 lbs per U.S. gallon).
8. Shelf Life, Rotation & Inspection of Stored Water
Shelf Life of Stored Water:
- Commercially Bottled Water: Typically has a "best by" date of 1-2 years printed on the bottle. The water itself doesn't expire, but the plastic bottle can begin to degrade over time, potentially affecting taste or leaching microplastics/chemicals.
- Properly Stored and Treated Self-Filled Water: If stored in appropriate food-grade containers in ideal conditions and properly treated, water can theoretically be stored indefinitely. However, for practical purposes and to ensure quality and freshness:
Rotation Schedule:
- Commercially Bottled Water: It's good practice to rotate annually, using the oldest stock first and replacing it with a fresh supply. At a minimum, check "best by" dates.
- Self-Treated Tap Water: Recommended to rotate every 6 to 12 months. This ensures it remains fresh-tasting and minimizes any potential for contamination or degradation. Six months is a common recommendation for optimal quality.
- Making Rotation Easy: When you add new water, place it at the back of your storage and use the water from the front (FIFO - First-In, First-Out method).
Inspecting Your Stored Water:
- Containers: Periodically check containers for leaks, cracks, or signs of degradation (e.g., plastic becoming brittle or discolored).
- Water Clarity: Before deciding to use or rotate, check if the water is still clear.
- Odor: Smell the water. It should not have any unusual or chemical odors. A faint chlorine smell in self-treated water is normal initially but may dissipate over months.
9. Using Your Stored Water Safely & Wisely
Checking Before Use:
- Even if rotated regularly, before drinking any stored water:
- Look at its clarity. Is it cloudy or have floating particles?
- Smell it. Does it have any off-putting or chemical odors?
- If in Doubt, Re-Treat: If you have any concerns about the safety of your stored water (e.g., container seal might have been compromised, storage conditions weren't ideal, or it's been stored beyond the recommended rotation period without checks), it's wise to re-treat it before consumption, especially for drinking. You can boil it for one minute or re-disinfect it with bleach (if it doesn't already smell strongly of chlorine and the bleach is still potent).
Conserving Water During an Emergency:
Water will be a precious resource. Practice conservation:
- Drink what you need for health, but don't waste it.
- Utilize meltwater from ice in your freezer (if power is out and food is being managed).
- Water from the hot water tank can be a source (ensure electricity/gas to the tank is OFF, let it cool, and drain from the spigot at the bottom – be aware of sediment, so filter or let settle).
- Minimize toilet flushing. For urine, consider the "if it's yellow, let it mellow; if it's brown, flush it down" rule (only if plumbing is operational and you have non-potable water to spare for flushing, like from a pre-filled bathtub).
- Use disposable plates and cutlery to reduce or eliminate dishwashing. If washing is necessary, use minimal water in a basin system (wash, rinse).
- Catch water used for handwashing (if relatively clean, e.g., just soap and water) for other non-potable uses like flushing.
10. Important Disclaimers & Best Practices for Water Storage
- This guide provides general information. Always consult your local emergency management agency (like Public Safety Canada or your provincial/municipal equivalent) or public health department for specific guidelines relevant to your area.
- Water quality varies. The safety and storability of tap water can differ by municipality. Well water quality can change and should be tested regularly.
- Proper treatment is key. Failure to properly treat and store water can lead to illness. If unsure, always err on the side of more rigorous treatment.
- Container integrity is vital. Use only food-grade containers and inspect them regularly.
- No guarantees. Shelf life and safety depend on your adherence to best practices.
- Practice makes perfect. Try out your water collection, treatment, and storage methods before an emergency occurs to build familiarity and confidence.
- Water is only one part of preparedness. Also consider food, first aid, communication, lighting, shelter, sanitation, and other emergency essentials.
This comprehensive guide should equip you with the knowledge to establish and maintain a safe emergency water supply. Stay vigilant, prepare wisely, and prioritize safety.